Data Plane on AWS VMs (Terraform)
Deploy the Aurva Data Plane on AWS EC2 using Terraform.
Overview
The Aurva Data Plane collects discovery, classification, query activity, and posture telemetry from your environment and forwards it to the Aurva Control Plane. It is ideally deployed in the same VPC as the target databases for low-latency connectivity.
Three deployment models are supported for the Data Plane:
- EC2 Auto Scaling Group — all components run on EC2 instances managed by an ASG (covered in this guide).
- EKS — pods running inside an existing Kubernetes cluster. See Data Plane on AWS EKS.
- ECS — containers running inside an existing ECS cluster.
This guide covers the EC2 ASG deployment using the Aurva-provided Terraform module.
High Level Architecture
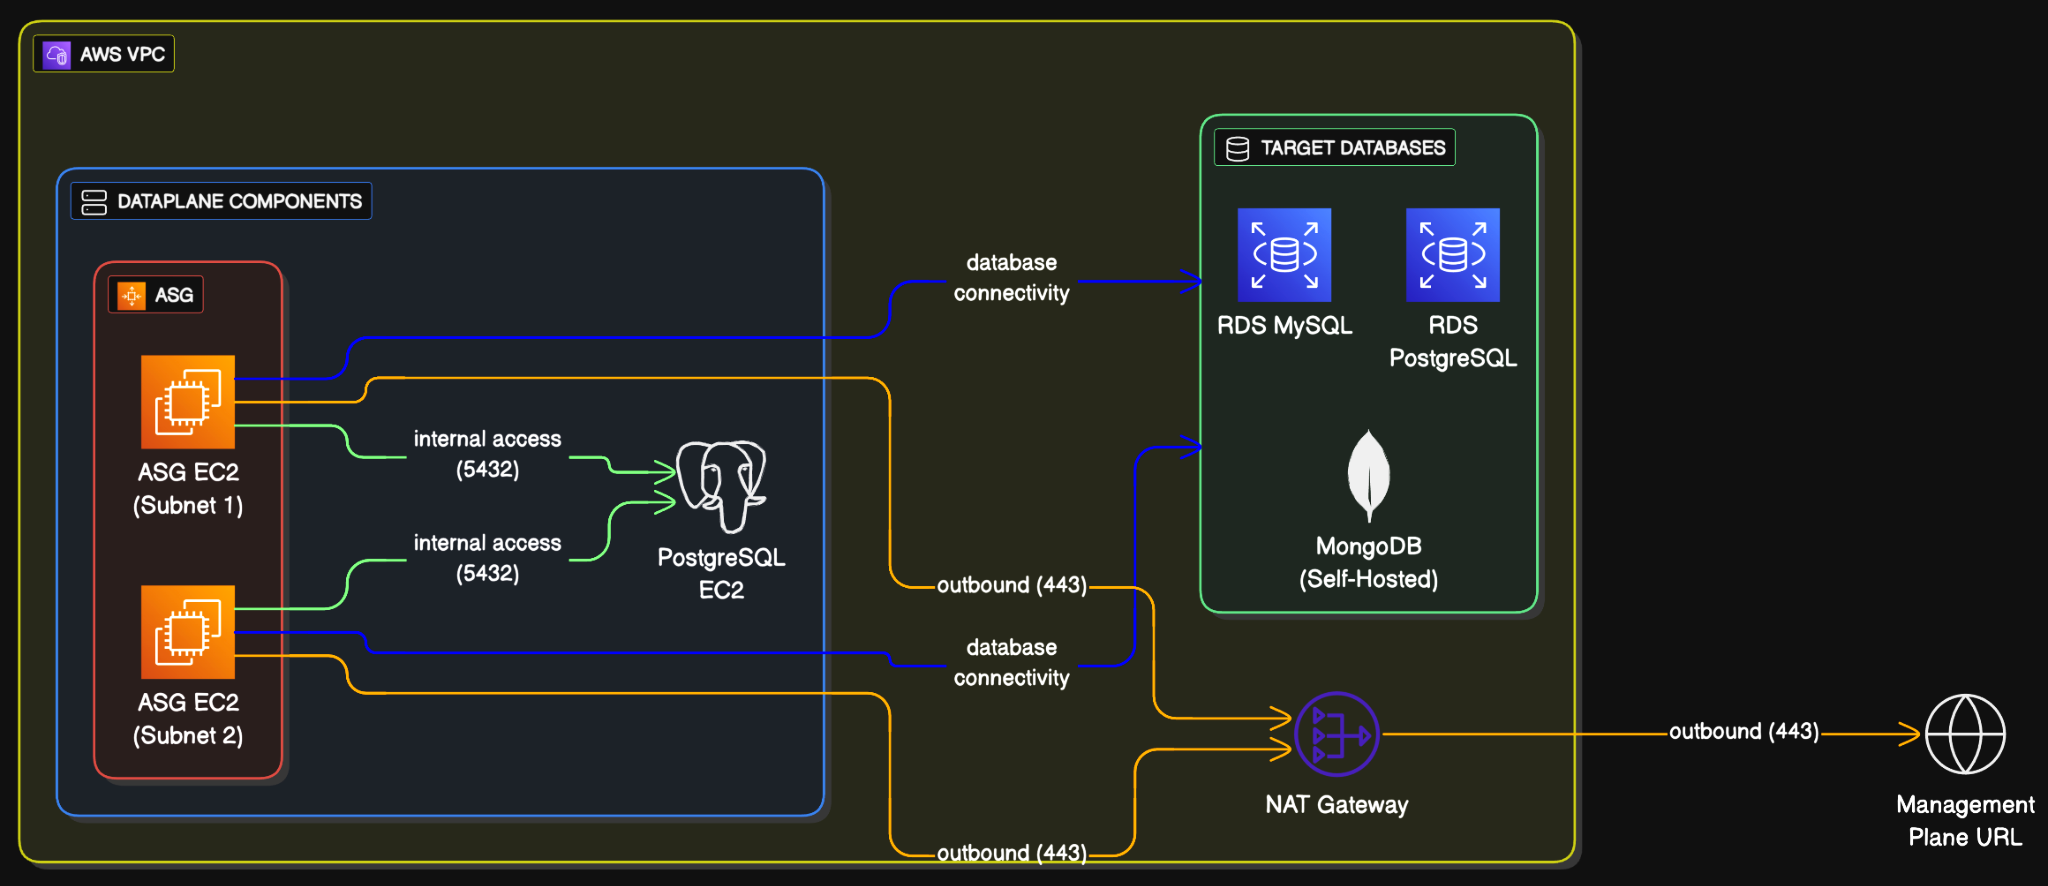
Infrastructure Components
The Terraform module provisions the following AWS resources. The table is included for reference — you do not need to create these manually.
Compute
| Resource | Name | Configuration |
|---|---|---|
| Auto Scaling Group | aurva-dataplane-asg | Min 2, Max 3, Desired 2; rolling upgrades |
| Launch Template | aurva-dataplane-launch-template | Ubuntu 20/22/24, Amazon Linux 2023, RHEL 8/9/10 |
| EC2 Instance | aurva-dataplane-instance | c5a.large (4 vCPU, 16 GB RAM) |
| EBS Volume | /dev/xvda | gp3, 50 GB |
PostgreSQL (metadata store)
| Resource | Name | Configuration |
|---|---|---|
| EC2 Instance | aurva-postgresql-instance | t3g.small (2 vCPU, 2 GB RAM) |
| EBS Volume | /dev/xvda | gp3, 30 GB |
| Secret | aurva-postgresql-values | 30-day recovery, auto-generated password |
Security Groups
| Group | Direction | CIDR / Source | Port |
|---|---|---|---|
aurva-dataplane-sg | Outbound | 0.0.0.0/0 | 443 |
aurva-dataplane-sg | Outbound | VPC CIDR | 5432 |
aurva-postgresql-sg | Inbound | VPC CIDR | 5432 |
aurva-postgresql-sg | Outbound | 0.0.0.0/0 | 443 |
IAM
The module attaches the Aurva-managed read-only IAM permissions for DSPM and DAM, plus AmazonSSMManagedInstanceCore for SSM access. See AWS IAM Permissions for the Data Plane for the full policy.
Storage
| Resource | Configuration |
|---|---|
| S3 bucket (DAM only, optional) | Retention 3 days; SSE-3 encryption; public access blocked; bucket policy restricts to the Data Plane IAM role |
| Terraform backend | S3 bucket aurva-terraform-state-<ACCOUNT_ID> plus DynamoDB lock table aurva-terraform-locks (encrypted, versioned state) |
Networking Prerequisites
This applies only when a proxy or firewall controls outbound traffic. The following destinations must be reachable from the Data Plane ASG VPC:
| Destination | Port | Purpose |
|---|---|---|
Control Plane URL (command.aurva.io for production, command.uat.aurva.io for PoC; PaaS uses your internal subdomain) | 443 | Data Plane → Control Plane communication |
resources.deployment.aurva.io | 443 | Download deployment scripts and resources |
registry.aurva.io | 443 | Pull Aurva container images |
AWS APIs: sts, s3, rds, dynamodb, iam, cloudwatch (<service>.<region>.amazonaws.com) | 443 | Required for DAM and DSPM business logic. For strict-egress environments, add these as VPC endpoints manually (the Terraform module does not create them). |
Prerequisites
Install the following tools on the workstation that will run Terraform:
| Tool | Verify |
|---|---|
| Terraform | terraform version |
| AWS CLI | aws --version |
| AWS credentials | aws sts get-caller-identity (configure with aws configure --profile=PROFILE_NAME, then export AWS_PROFILE=PROFILE_NAME) |
Deployment Steps
Step 1 — Download the Terraform module
mkdir -p /opt/aurva-deployment && cd /opt/aurva-deployment
curl -O https://resources.deployment.aurva.io/manifests/main/install-dataplane-aws-vm.tar.gz
tar -xzvf install-dataplane-aws-vm.tar.gz
rm install-dataplane-aws-vm.tar.gz
cd install-dataplane-aws-vm
Step 2 — Configure variables
cp terraform.tfvars.tpl terraform.tfvars
vi terraform.tfvars
The variables file is self-explanatory. Save and exit when done.
Step 3 — Initialize the Terraform backend
Linux / macOS:
chmod +x preflight.sh
bash preflight.sh
Windows (PowerShell):
./preflight.ps1
This provisions the S3 state bucket and DynamoDB lock table.
Step 4 — Apply the Terraform module
terraform init
terraform plan
terraform apply
Apply typically takes 5–10 minutes.
Verification
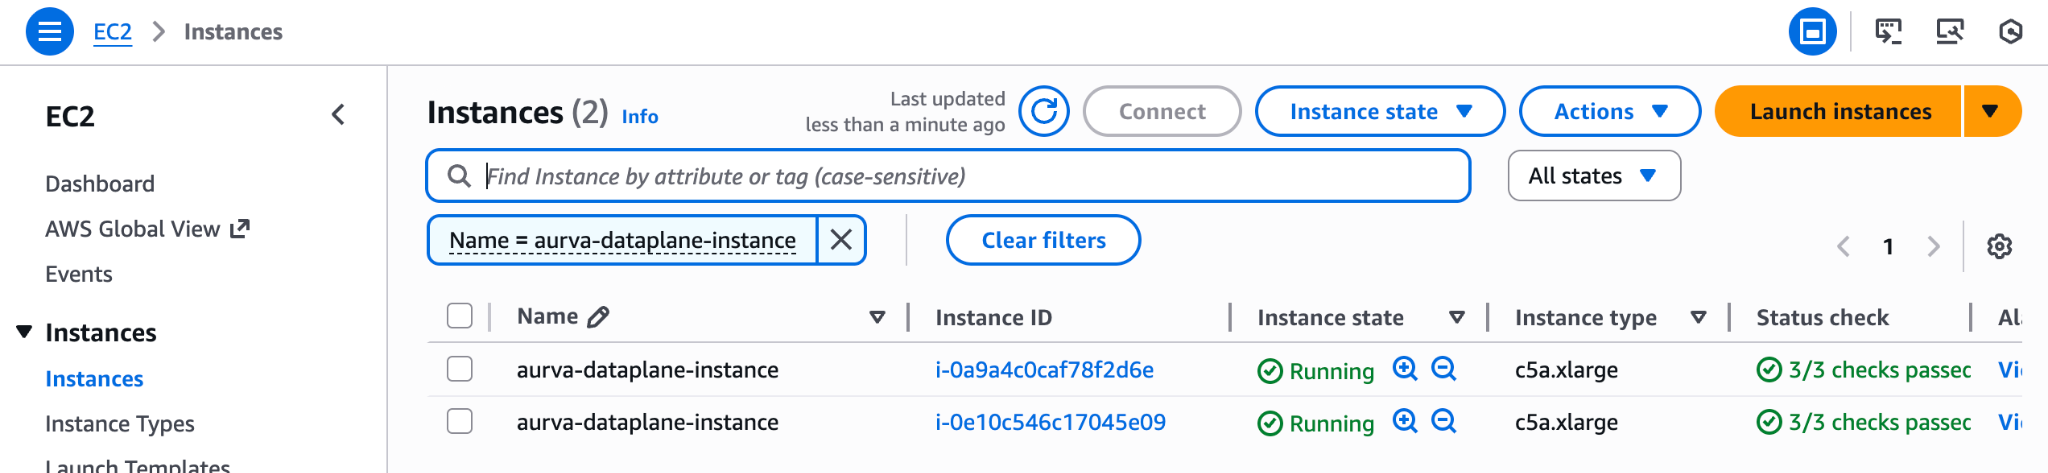
1. Locate a Data Plane instance
In the EC2 console, find the running aurva-dataplane-instance and copy its instance ID.
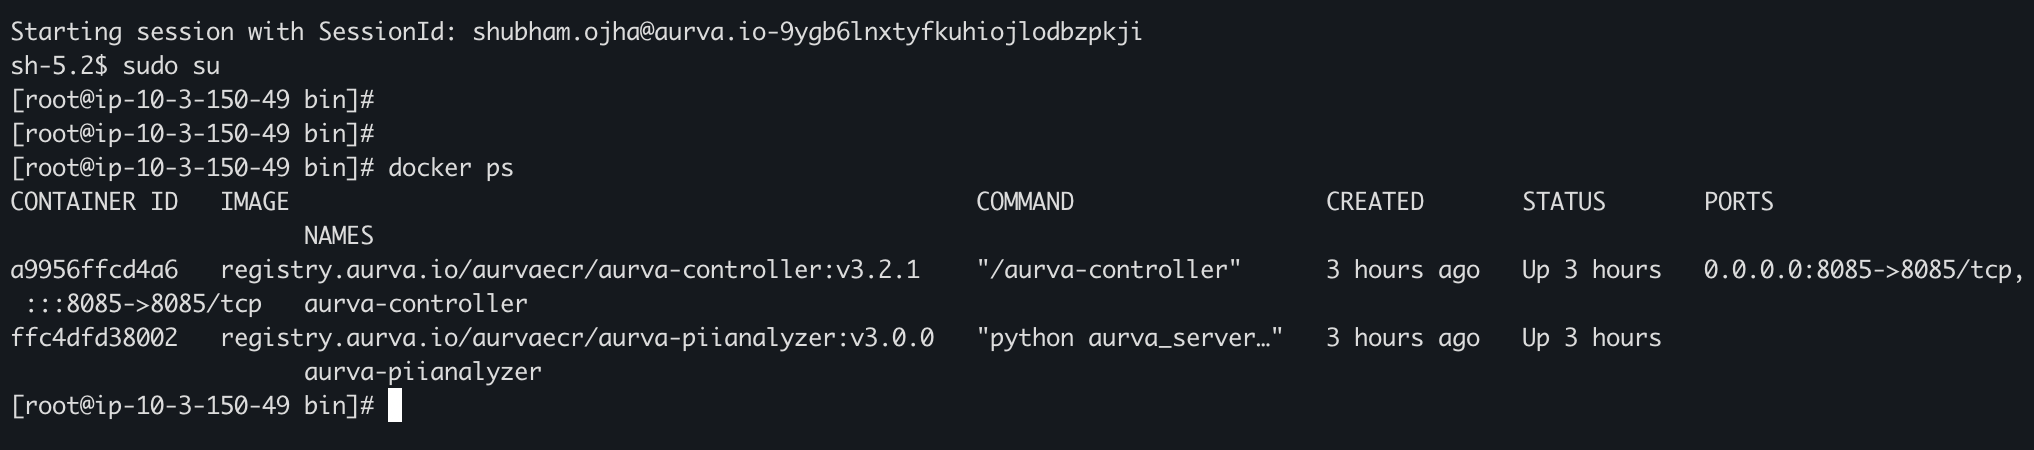
2. Connect via SSM and check containers
aws ssm start-session --target <INSTANCE_ID>
sudo su
docker ps
docker logs <CONTAINER_ID>
Containers usually come up 3–5 minutes after the instance starts.
3. Confirm in the Aurva console
Open Settings → Monitoring Configuration in the Aurva console. The new Data Plane (named per your terraform.tfvars) should appear and report Healthy within a few minutes.

Next Steps
- Onboard your first asset via Onboarding a Data Asset Manually.
- Enable DAM via Monitoring Configuration.
- Review AWS IAM Permissions for the Data Plane.