AIDA on Linux
Install the Aurva Intelligent Database Agent (AIDA) on standalone Linux database servers.
Overview
AIDA — the Aurva Intelligent Database Agent — is a self-installing log exporter that runs as a single binary on a database host. It bundles multiple log-collection backends behind one installer that handles install, upgrade, and uninstall.
This guide covers AIDA deployment for on-premises and standalone database servers as part of an Aurva DAM rollout.
High Level Architecture
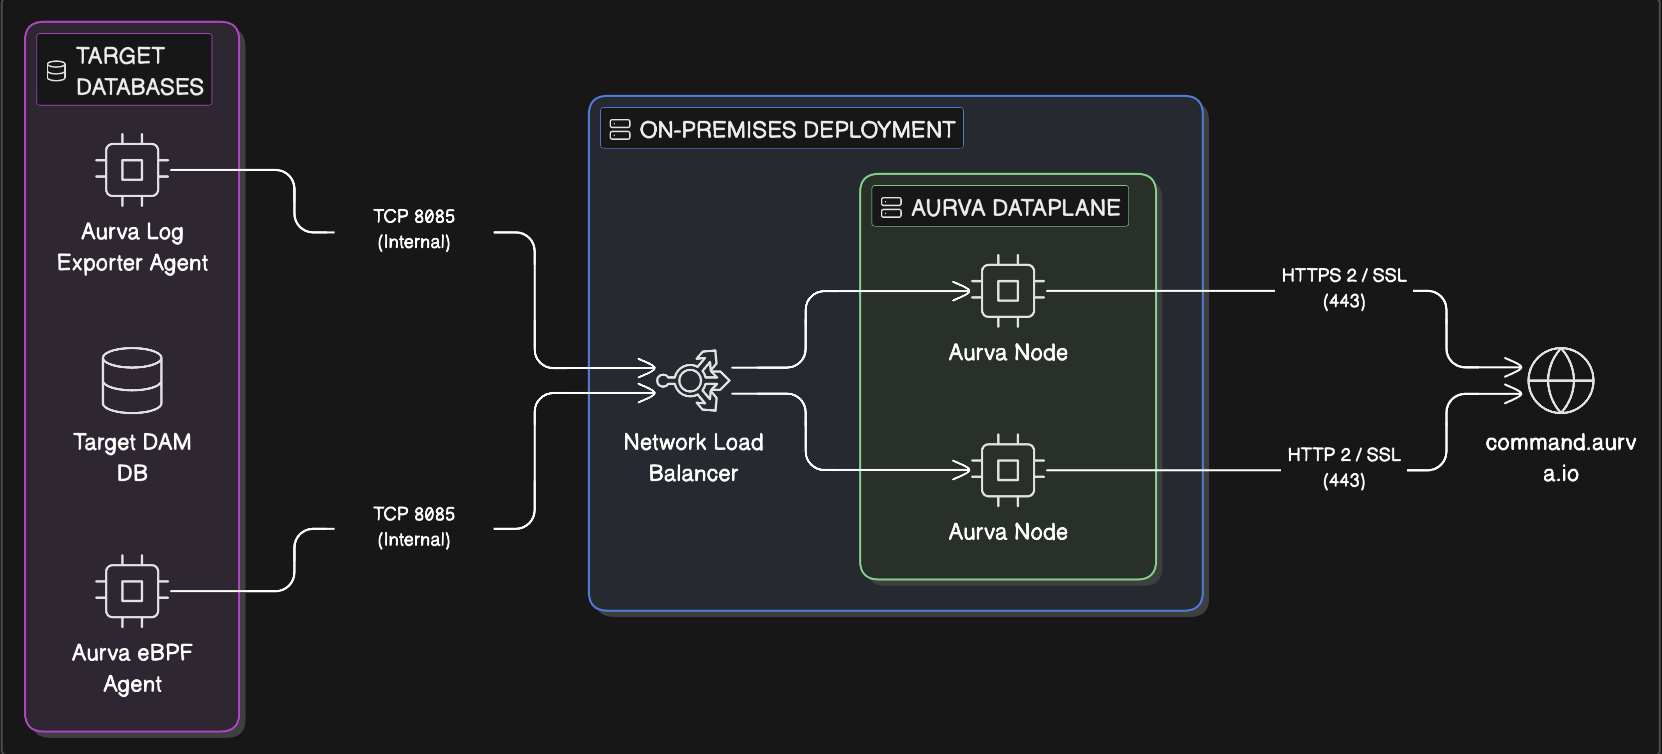
The infrastructure prerequisites and deployment steps are detailed below.
Infrastructure Prerequisites
AIDA is intended for standalone database servers. For managed services such as Amazon RDS, use AWS RDS DAM instead.
| Component | Requirement |
|---|---|
| Architecture | x86_64 or ARM64 |
| Supported OS | Ubuntu 20/22/24/25, RHEL & AlmaLinux 8/9/10, Oracle Linux 8/9/10 |
| Compute | 1 vCPU, 1 GB RAM (minimum) |
| Storage | 5 GB free disk |
Networking Prerequisites
The following endpoints must be reachable from the database host running AIDA:
| Target | Port | Purpose |
|---|---|---|
Aurva Data Plane controller (aurva-controller.<company_domain>) | 443 | Stream logs and register the database with the platform. Ask your DevOps team for the internal subdomain. |
| Local database instance | DB native port | Required for Oracle, ClickHouse, and MariaDB collection |
| SSH access to the host | 22 | Required to copy, configure, and install the binary |
Deployment Steps
AIDA presents an interactive installation wizard when invoked. Run the steps below in order on the target database host.
Step 1 / 3 — Become root
sudo su
Step 2 / 3 — Move AIDA into place and make it executable
Place the AIDA binary (provided by Aurva support) in any directory of your choice, then mark it executable:
chmod +x <aida_binary>
Step 3 / 3 — Run the installer
./<aida_binary> install
Follow the on-screen prompts to choose the appropriate exporter for your database engine. For help at any time:
./<aida_binary> help
Deployment Verification
After installation completes, confirm AIDA is operating correctly.
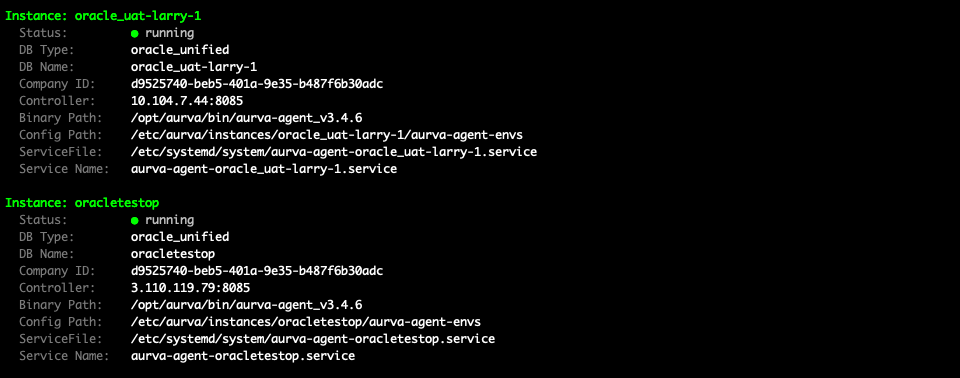
1. Check installation status
The installer prints status on completion. To re-check at any time:
./<aida_binary> list
./<aida_binary> status
2. Confirm queries arrive in the Aurva console
Open the Audit Trail page in the Aurva console and filter by the newly onboarded data source. Recent queries against the database should appear within a few minutes.

Next Steps
- Add the database to monitoring via the Monitoring Configuration page so queries are tied to a managed asset.
- See Troubleshooting → DAM Agents for common issues.